Intro-to-git-GitHub
Authenticating with GitHub
Prior to August 13, 2021, you were allowed to authenticate by typing a username and password every time you pushed or pulled from GitHub. This is no longer the case. You now need to create a Personal Access Token (PAT). Another option not covered here but one that may be more robust in a professional setting is SSH-based authentication. If you want to learn more about SSH authentication, see here. Note that if you are using a Linux OS, the SSH based authentication is a better solution.
A Personal Access Token (PAT) is unique to each computer you work off of. You will therefore need to repeat the following steps for each computer you are working off of.
Creating the token on GitHub
First, you need to follow these steps on GitHub:
-
Click on your avatar (upper right-hand corner) and select Settings.
-
On the left sidebar, click on Developer settings (this should be near the bottom of the left sidebar).
-
In the left sidebar, click Personal access tokens. If you are provided with an option, select Tokens (classic).
-
Click Generate new token (button near the upper right-hand side). If you are provided with an option, select … (classic).
-
In the Note field, assign a name to this token such as the local computer you are creating this token for.
-
In the next field, you can set an expiration date for this token, or make it permanent. In this example, we’ll set it for 90 days.
-
From the scopes menu, select repo. This will allow you to read/write to your repo.

-
Click Generate token at the bottom of the page.
-
Copy and temporarily save the token before closing the window.
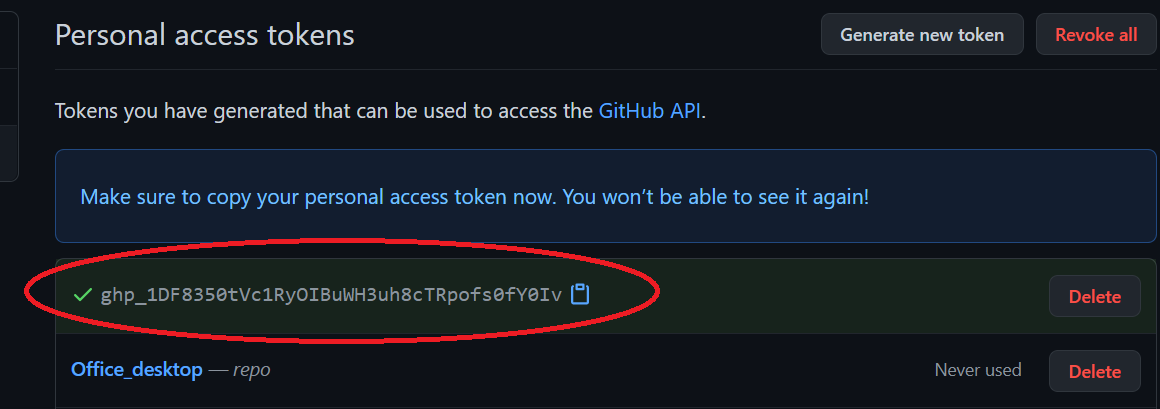
When copying the token id, be careful not to add any empty spaces to the beginning or end of the token. It might be a good idea to temporarily paste the token into a plain text editor.
Note that you will not be able to access the token string once you exit the window! You might want to keep this window open until you’ve completed the steps outlined next.
Adding the token to your device
Saving tokens on a Mac
You’ll need the OSX keychain credential helper. If you installed Git using Homebrew or via the Xcode command line, then osxkeychain helper should be part of the installation.
You can check for its installation via the following command:
$ git credential-osxkeychain
To have Git store the token in osxkeychain, type:
$ git config --global credential.helper osxkeychain
The next time you are prompted for a user name and password, simply type your GitHub account name, then your personal access token. This will be a one time operation after which the token will be permanently stored.
Click here to for more information on using Keychain with Git.
NOTE: If you were redirected here from Cloning a homework assignment page, you will now want to go back to that page to continue with the cloning process.
Note that the credentials get stored in Windows’ Credential Manager.
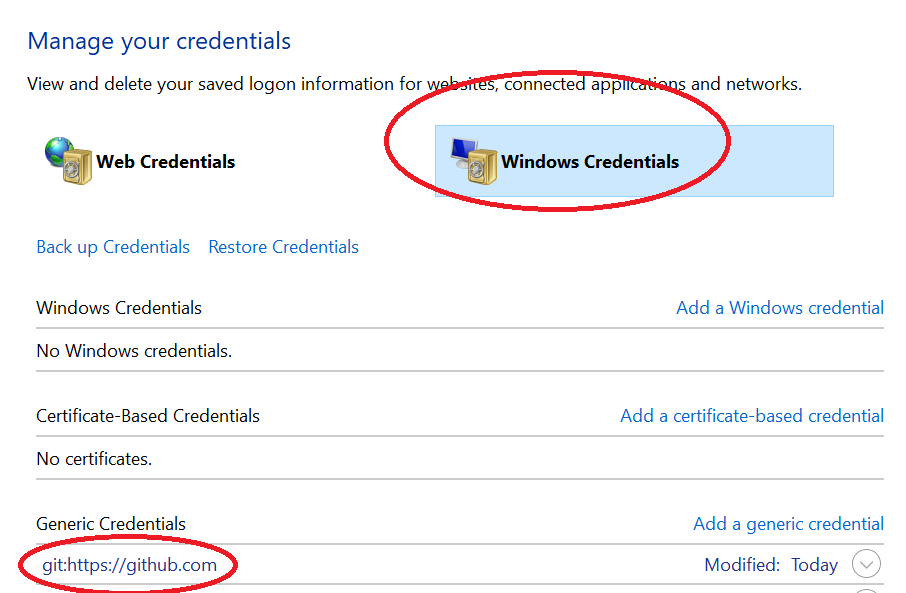
You can delete this stored credential by accessing the Credential Manager via Control Panel » All Control Panel Items » Credential Manager or by simply typing Credential Manager in the Windows’ task bar. But only do so when you no longer need to clone/push/pull from GitHub.
 Manny Gimond (2022)
</br>
Manny Gimond (2022)
</br>