Intro-to-git-GitHub
Proceed with the following steps when you are ready to commit changes made in your local repo folder such as modifying R scripts or adding/removing files. These commits act as “bookmarks”” in the evolution of your project folder. Changes made to your project folder can be undone by referencing these bookmarks.
Quick instructions
If you don’t need to review the step-by-step instructions, the basic steps follow. We’ll assume that the repo is named HW123 (this should be the same name as your local project folder).
git add --all
git commit -m "type your message here"
Step-by-step instructions
- Make sure that you’ve saved any R/Rmd scripts before committing .
- Open a git bash shell. Alternatively, you can use the Terminal pane in RStudio.
- Navigate to your project folder using the
cdcommand. Remember that you can use the short cut~character to reference your home directory. In this example, we are assuming the that project folder is namedHW123, which is a repository created and cloned to the folderES218.cd ~/Documents/ES218/HW123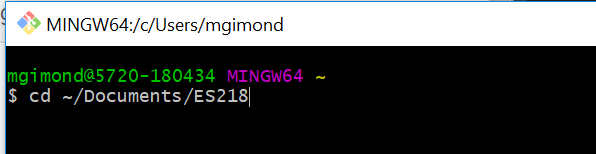
You can check the contents of the folder by typing
ls. If you want to view hidden files, including the.gitfolder, typels -a.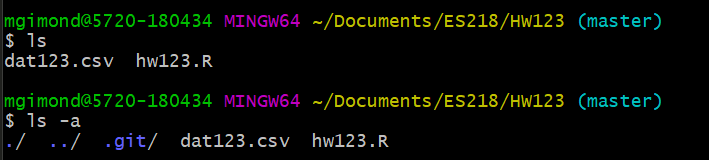
You should see, at the very least, a
.git/folder. If you do not, then you are not working off of a cloned repo or a git environment was not properly generated. -
The next step involves staging your work. Basically, this step allows you to select the files and/or folders that you want to commit.
You can add files/folders individually (this option should be chosen if you have R/Rmd files that you do not yet want to commit). For example, to stage the files
dat123.csvandhw123.Rtype:git add dat123.csv hw123.RAlternatively, if you want all files and folders to be uploaded to your Github repo, type:
git add --all -
Check that the files are properly staged by typing
git status. Any files ready to be pushed to Github should be highlighted in green.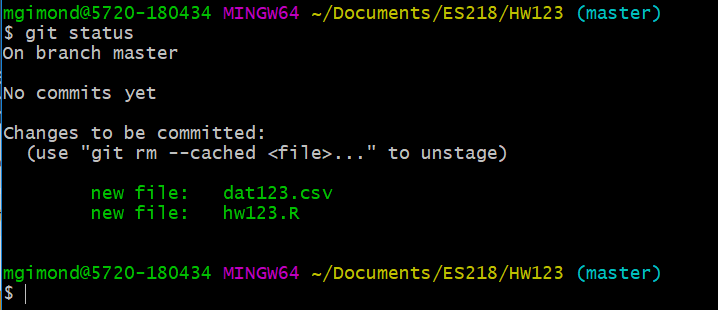
- The next step involves committing. Here, you will simply add a message to your commit. This step can be very useful in helping revert back to an earlier version of a project by using the comments as placeholders for various versions of project. In such a case, you usually want to use short but descriptive comments to help pinpoint key changes to a project file. For a homework assignment, this is less critical, but for good practice, you are encouraged to make good use of this step. Here, we’ll label this commit
first HW attemptas follows:git commit -m "first HW attempt"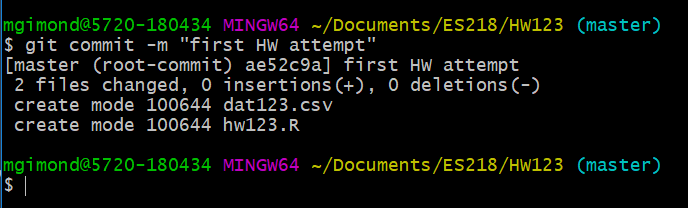
-
You can once again run the
git statuscommand to check that any change in your local repo was properly staged and commited.
The message may state that “your branch is ahead of ‘origin/main’”. This is just to remind you that the changes made locally to your repo have not been reflected on Github.com.
 Manny Gimond (2022)
</br>
Manny Gimond (2022)
</br>