Finding the 5 mile driving distance to the nearest fire station
|
1. Create a folder called Firestations somewhere under your personal directory (e.g. C:\Users\jdoe\Documents\Tutorials\Firestations). 2. Download the data for this exercise then uncompress the Firestations.zip file to your newly created Firestations directory. |
In this exercise, you will use Network Analyst to identify all road segments that are within a 5 mile driving distance of the nearest fire station. You will then create two outputs: the road segments that are within 5 miles and the road segments that are outside the 5 miles driving distance.
You will need to enable the Network Analyst extension to complete most of the steps in this exercise.
Step 1: Set up your Map Document
Step 2: Set up the Network Analysis Environment
Step 3: Run and analyze the network analysis.
Open the map document Firestations.mxd that is located in your Firestations folder.
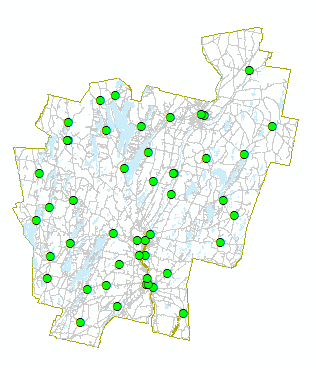
The map shows the outline of Kennebec County along with its roads and fire station locations.
To use Network Analyst, you need to load a Network dataset in your map document. A Network dataset is usually created inside of a geodatabase.
In your map document, expand the Catalog window (you should see a Catalog tab on the right edge of the map document window).
In the Catalog window, expand the Data.gdb geodatabase then expand the roads feature dataset
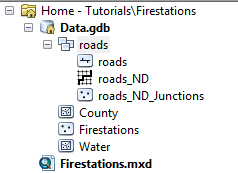
Three feature classes are present in the roads feature dataset: roads (a vector layer already loaded inside your map document), roads_ND (the network dataset needed to perform the network analysis) and roads_ND_Junctions (a byproduct of the network dataset that identifies all road junctions).
The network dataset you will use in this exercise was already created for this exercise. Click here if you want to learn more about creating a network dataset from a roads layer.
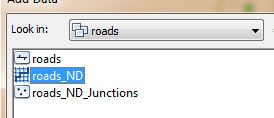
Click the Add Data button and load the roads_ND network dataset.
When you load the dataset, you may be prompted to add other features to your map document.
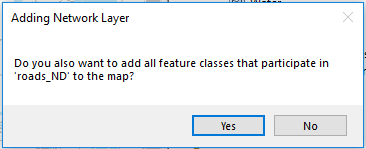
Click No since the road feature is already present in your map document.
The roads_ND layer is a polyline vector layer that mirrors the roads layer already present in your map document. It differs from the roads layer in that it does not share the same attribute values (i.e. if you need to label the roads in your map, you need to use the roads layer and not the roads_ND layer).
Network Analyst is an extension that needs to be activated within your map session.
From the Customize pull-down menu, select Extensions.
Check the box next to Network Analyst.

Click Close to exit the Extensions window.
From the Customize pull-down menu, select Toolbars >> Network Analyst.
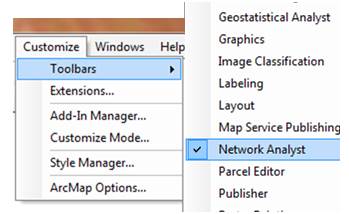
This adds the Network Analyst toolbar to your map document.
![]()
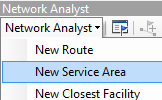
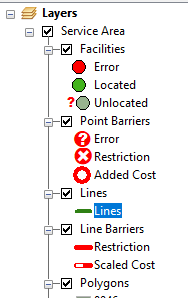
From the Network Analyst toolbar, select Network Analyst >> New Service Area.
A new layer group gets added to your map document’s TOC. The Facilities layer (an input) will be assigned the fire station points. If you wanted to explicitly define barriers (i.e. road segments not to use in the analysis), you could add points to the Point Barriers, however, we will not use this option in this exercise. We are assuming that all connected road segments are navigable.
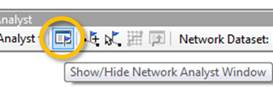
Next, we will add another window (Network Analyst window) to the map document.
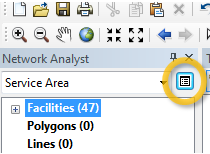
On the Network Analyst toolbar click on the Show/Hide Network Analyst Window button.
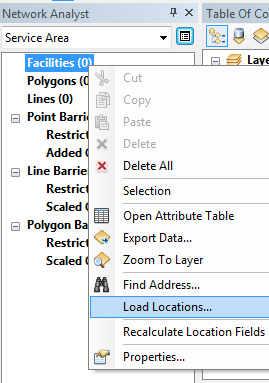
In the Network Analyst window you just opened, right-click on Facilities and select Load Locations.
In the Load Locations window, select Firestations. Keep all other defaults.
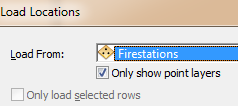
Click OK to close the Load Locations window.
The Facilities layer now includes all fire station points (there should be 47 points total). Network Analyst will run the analysis for all point locations in the Facilities layer.
Next, we need to set additional parameters before we can run the analysis.
In the Network Analyst window, click on the Service Area Properties button.
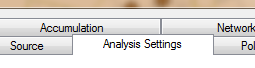
In the Layer Properties window you just opened, click on the Analysis Settings tab.
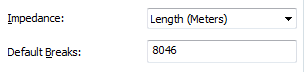
Here, you will define the 5 mile driving distance limit. Since the map and layer units are in meters, you will need to define the distance in units of meters (5 miles = 8046 meters)
In the Default Breaks field, type 8046.
Next, click on the Line Generation tab.
Check the box next to Generate Lines.
Select the Not Overlapping option.
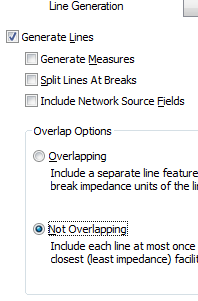
Since many road segments may be within 5 miles of more than one fire station, the last option ensures that a single route (the one associated with the closest fire station) is assigned to a road segment. The Overlapping option would have overlapped multiple routes if more than one fire station was within 5 miles.
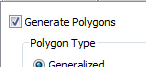
Next, click on the Polygon Generation tab.
Make sure that the box next to Generate Polygons is checked.
Select the Detailed option.
Set the Trim Polygons to 0 meters.
Select Not Overlapping.
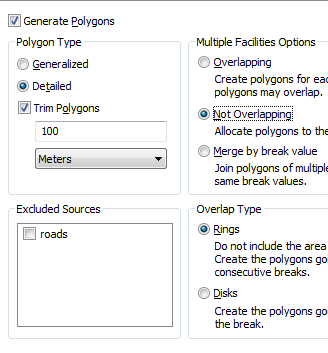
The polygons generated from this analysis will outline all road segments that fall within the 5 mile drive distance criteria. We will use this polygon later in the exercise to extract all road segments that do not meet the criteria.
Click OK to close the Layer Properties window.
Now that we have finished defining our network analysis environment, we can run the analysis.
On the Network Analyst toolbar, click on the Solve button.

The analysis will populate the Lines and Polygons layers in the Service Area group. For each fire station a new polyline record is created. By default ArcMap assigns a single color to all records. You can change the color/symbology to help distinguish the different routes.
Assign a unique color to each Lines record.
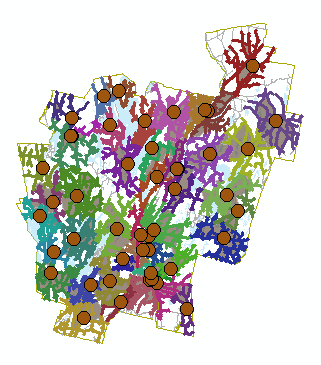
If you zoom in on an area, you’ll notice that polygons delineate the road segments that meet the 5 mile driving distance as defined in the previous step.
NOTE: In some cases, you may find erroneous results (i.e. road segments that are improperly identified as being outside the defined 5 miles distance). These errors can be a result of line segments in the original roads layer not properly connected at their vertices (i.e. not snapped). ArcMap treats such road segments as unconnected even if the unsnapped vertices overlap! It is therefore important that a properly digitized roads layer be used before a network analysis is performed.
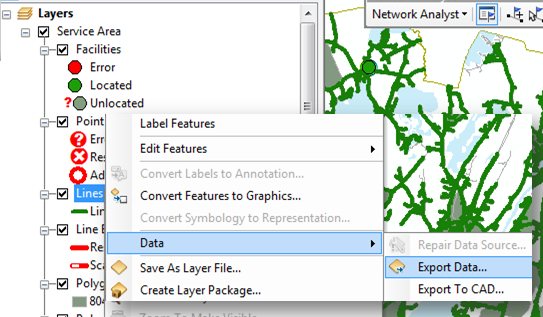
The layers in the Service Area group only reside within the MXD map document. If you want to use the Lines or Polygons layers in another map document, you should export these layers to a permanent shapefile or geodatabase feature class. In the following step, you will export only the Lines layer to a feature class.
Right-click on the Lines layer and select Data >> Export Data.
Set the output to …\Firestations\Data.gdb\Within_5_miles.
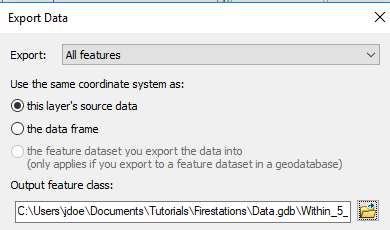
Click OK.
If prompted to add the layer to your map, select Yes.
Assign unique colors to the Within_5_miles features based on the FacilityID field (there should be 47 unique facilities).
You might find it useful to isolate all road segments that do not fall within a 5 mile driving distance of a nearest fire station. The analysis does not explicitly define these segments. You will therefore use the Polygons layer to “erase” the within-5-miles road segments from the original roads layer to create a new outside_5_miles feature class.
In ArcToolbox, select Analysis Tools >> Overlay >> Erase.
Select roads as the Input Features, Service Area\Polygons as the Erase Features and …\Firestations\Data.gdb\outside_5_miles as the output.
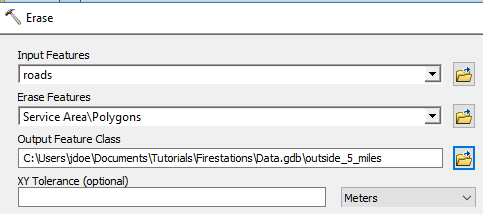
Click OK.
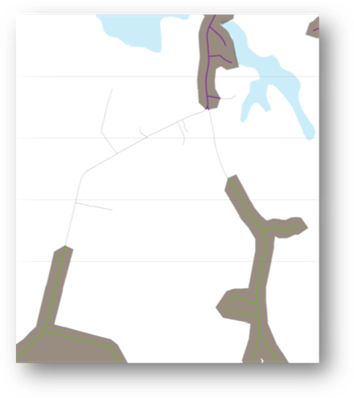
You now have a separate polyline layer (shown in red in the following graphic) that identifies all road segments not meeting the 5 mile driving distance criteria.
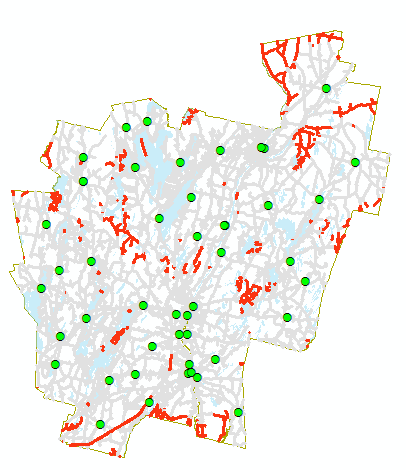
This ends this exercise.
![]() Manuel Gimond, last modified on 7/13/2018
Manuel Gimond, last modified on 7/13/2018