Managing GIS Data
|
1. Create a folder called Data_management_exercise somewhere under your personal directory (e.g. C:\Users\jdoe\Documents\Tutorials\ Data_management_exercise). 2. Download the data for this exercise and extract the files from the Data_management.zip file to your newly created Data_management_exercise directory. |
When working on an ArcMap document (one ending with a *.mxd extension) you are accessing one or more data files. These data features are not stored in the *.mxd file but instead can be located in separate folders, geodatabases or across a network connection. Knowing where your GIS data reside is critical when managing and sharing a GIS project.
For this tutorial, you’ll be working with data for the Acadia National Park area. You will learn to use ArcCatalog to copy and delete features from a workspace. You will also learn about folder connections and how to fix broken map document links.
Contents
Step 1: Create a Folder Connection
Step 2: Identifying layer source paths
Step 3: Creating a File Geodatabase
Step 4: Migrating files from one format to another
Step 5: Removing GIS files from a workspace
Step 6: Fixing broken links in ArcMap
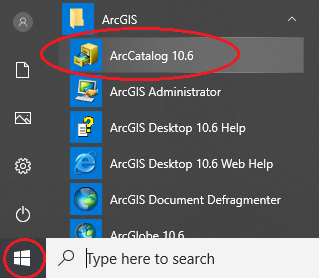
Click the ![]() icon
on the Windows taskbar, then point to ArcGIS and click on ArcCatalog
10.6.
icon
on the Windows taskbar, then point to ArcGIS and click on ArcCatalog
10.6.
ArcGIS’s file management environment differs from that of a conventional file management environment common to different operating systems. For example, when you first open ArcCatalog, you will notice that your typical root directory structure is gone. For instance, you will not see a Desktop folder or a C: drive letter designation. Instead, ArcGIS wants you to explicitly define your workspaces.
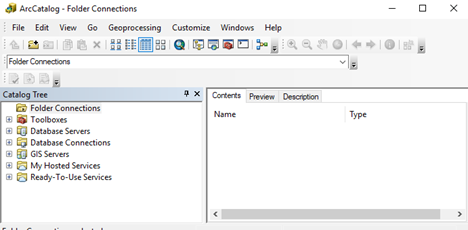
In this exercise, you will restrict your workspace to the Data_management_exercise folder.
Right-click on the Folder Connections folder in the Catalog Tree and click Connect Folder.
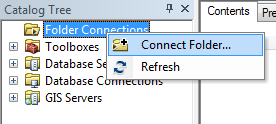
You can create connections to both folders and databases.
· Folder connections let you access folders, or directories, on local disks or shared folders on the network.
· Database connections let you access the contents of a database (local or remote).
In the Connect to Folder window, select this exercise’s project folder (Data_management_exercise) and click OK.
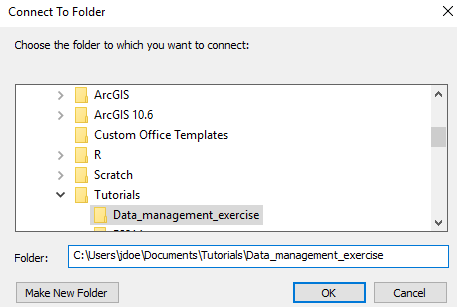
You now should see a new connection under Folder Connections. This connection will persist even when you log off from your desktop. But this connection is not transferable (i.e. if you move your map document to a different PC, the folder connection will not carry over).
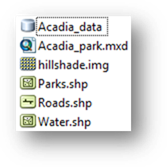
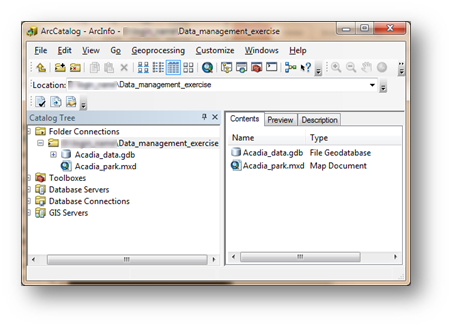
In ArcCatalog, make sure that you have this exercise’s workspace selected. In the right window pane you should see a list of GIS files (three shapefiles and one raster) and a map document (Acadia_park).
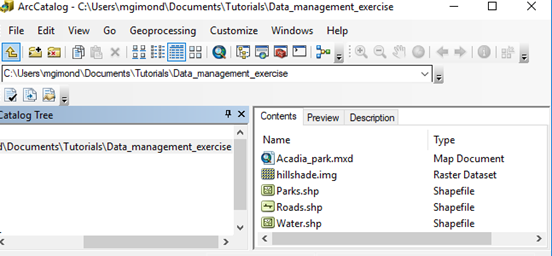
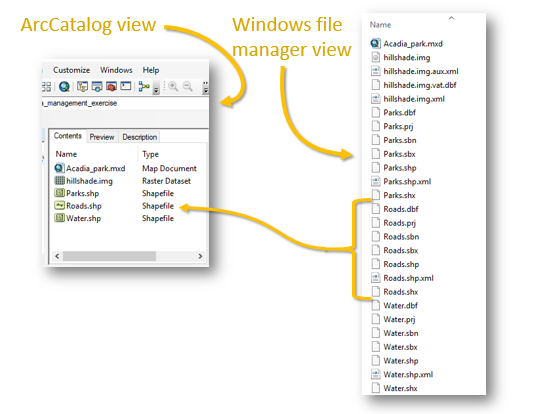
ArcCatalog views the contents of a folder (or database) differently from a standard file management window.
To see this for yourself, open Windows Explorer (not to be confused with Internet Explorer)
![]()
Navigate to this exercise’s workspace folder.
Note how different the contents of the folder look between ArcCatalog and Windows Explorer. ArcGIS only displays file formats that can be used in a GIS. In this example, we have two different file formats: a shapefile vector format and an Imagine raster format. A shapefile format consists of anywhere between three and seven files. In our example, all three vector layers in our project consist of seven files each. Each file of a shapefile layer contains different bits of information. For example, a .prj file contains information about the shapefile’s coordinate system and a .dbf file contains information about the shapefile’s attribute(s).
At this point, it is important to note that GIS data management should be done exclusively inside of ArcCatalog and not inside of Windows Manager.
Another file displayed by ArcCatalog (and recognized as a
GIS file type) is the Acadia_park.mxd file ![]() . This is the project file
that instructs ArcMap on which GIS data files to map and how to
display them in the map document. Note that the .mxd file does not store
the GIS data (i.e. it reads the data from the various GIS data files located in
the project folder).
. This is the project file
that instructs ArcMap on which GIS data files to map and how to
display them in the map document. Note that the .mxd file does not store
the GIS data (i.e. it reads the data from the various GIS data files located in
the project folder).
Double-click on the Acadia_park MXD file to open the map document.
The MXD document should open up inside of Arcmap.
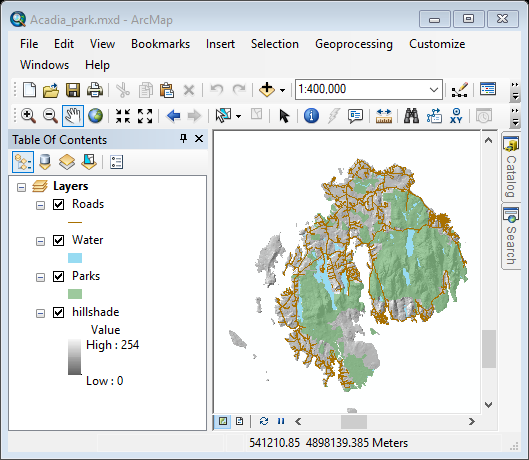
When opening an existing ArcMap document, it is always good practice to locate the source of each layer listed in the Table of Contents (TOC).
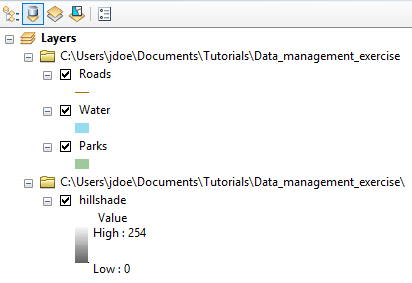
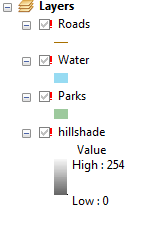
In the TOC click on the List By Source
button![]() .
.
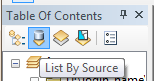
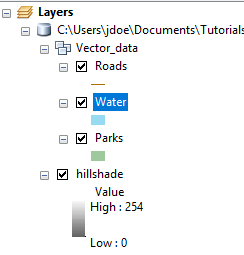
The listing in the TOC will look different. For each layer, the source location is identified. For example, the raster layer hillshade is located in the folder .\Data_management_exercise. The other vectors layers (Roads, Water and Parks) are also located in the .\Data_management_exercise folder. Remember that ArcMap does not store GIS data features in the .mxd document. Instead, it stores information about the source location for each feature. So when ArcMap draws the hillshade in the Map view window, it accesses the raster file hillshade.img located in the .\Data_management_exercise folder and grabs all the data needed to draw the hillshade layer. So it is vital that the location of all features used in a map document be properly sourced in the TOC.
Close ArcMap. If asked to save changes, select No.
GIS data can be stored in many different formats. So far you have been exposed to shapefile and Imagine file formats. ArcGIS can also store GIS data in more complex data storage structures such as geodatabases.
ArcGIS can read from many different geodatabases. Some common ones are ArcSDE, PosgreSQL and File Geodatabase. The latter can be easily implemented on personal computers. In the following steps, you will create a new file geodatabase.
Go back to your ArcCatalog window.
Right-click this exercise’s folder connection and select New >> File Geodatabase.
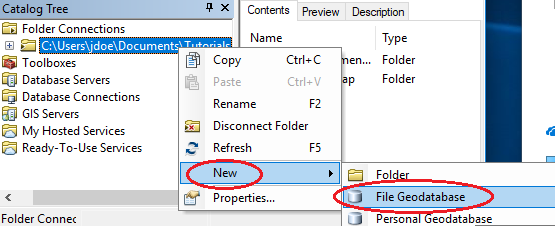
A new file geodatabase will be added to your Data_management_exercise folder.
Right-click on the newly created geodatabase and select rename.
You will rename the geodatabase Acadia_data.
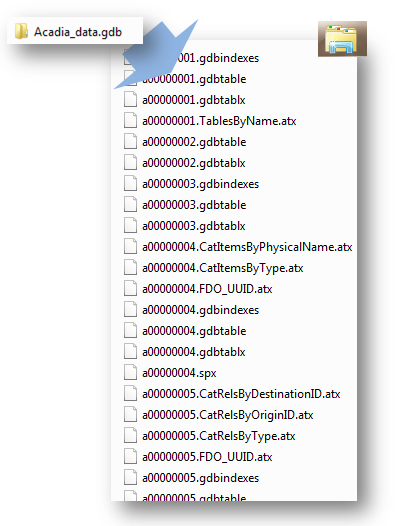
A File Geodatabase is nothing more than a folder. In fact, if you look at your project’s folder in Windows Explorer, you will see a folder called Acadia_data.gdb. The content of this folder may be indecipherable. This should be a reminder to never modify the contents of this folder in Windows Explorer.
|
!!! NEVER modify the
contents of a *.gdb folder outside of ArcCatalog !!! |
Your next step will involve migrating the four GIS files to the newly created geodatabase Acadia_data.
First, you will create a feature dataset (think of this as a folder inside of a geodatabase). Feature datasets are used to spatially or thematically integrate related feature classes. See here for more information.
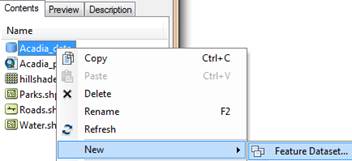
In ArcCatalog, Right-click on the Acadia_data geodatabase and select New >> Feature Dataset.
In the New Feature Dataset window, name the new feature dataset Vector_data.
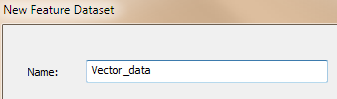
Click Next.
Select Projected Coordinate Systems >> UTM >> NAD 1983 >> NAD 1983 UTM Zone 19N for the dataset’s coordinate system.
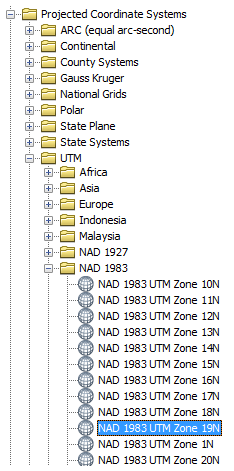
Any features created in or copied to this feature dataset will inherit the UTM NAD83 Zone 19 North coordinate system. If the data need to be reprojected, ArcGIS will reproject on the fly.
Click Next.
Click Next again (we won’t define a Vertical Coordinate System for this feature dataset).
Click Finish.
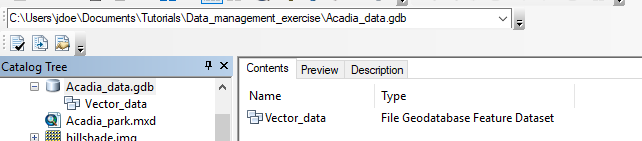
If you expand you folder connection in ArcCatalog, you should see the newly created Vector_data dataset.
Next, you will copy all three vector files to this dataset.
Right-click the newly created Vector_data feature dataset and select Import >> Feature Class (multiple).
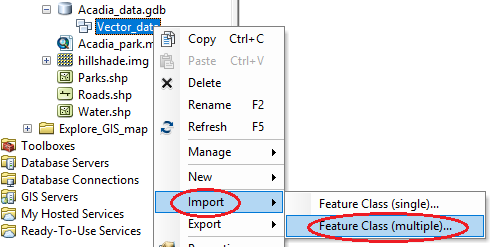
In the Feature Class to Geodabase (multiple)
window, click on the folder icon ![]() to the right of
the Input Features field.
to the right of
the Input Features field.
Navigate to your Data_management_exercise connection (remember that it is accessed from the Folder Connections folder) and select the three vector features.
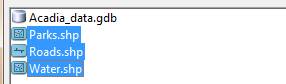
Click Add.
The three vector features should now be listed in the window.
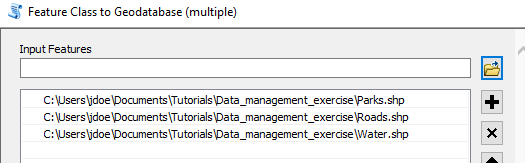
Click OK to begin the migration process.
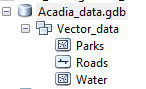
After 10 or 20 seconds, the newly migrated features should appear in the Vector_data feature dataset.
Next, you will copy the raster data feature into the geodatabase. Raster features cannot be stored inside of feature datasets, instead they are stored at the root level of the geodatabase.
Right-click on the Acadia_data geodatabase and select Import >> Raster Datasets.

In the Raster to Geodatabase window, click on the
folder icon ![]() to the right of the Input
Rasters field.
to the right of the Input
Rasters field.
Navigate to your Data_management_exercise connection folder and select the hillshade.img raster file.
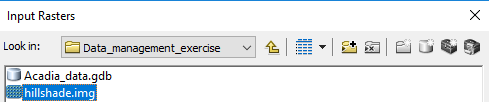
Click Add.
Click OK to start the Raster-To-Geodatabase process.
After 10 seconds or so, expand the Acadia_data geodatabase. You should see the new hillshade raster feature.

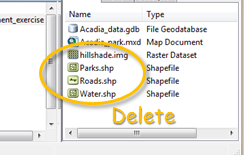
Now that we have all four features (three vectors and one raster) inside of a geodatabase, we no longer need the shapefile and Imagine file versions of these features.
In ArcCatalog, select the Data_management_exercise folder connection.
In the right window pane of ArcCatalog you should see the geodatabase, the shapefiles and Imagine raster file.
In the right window pane, select and delete the hillshade, Parks, Roads and Water features. (Note that if you did not close ArcMap earlier in the exercise you will need to do so before you attempt to delete the files).
Your Data_management_exercise folder should now look like this:
From inside ArcCatalog, double-click on the Acadia_park MXD file. This will open the map document in an ArcMap session.
You will notice that the Map view window is now blank! You should also notice red exclamation marks next to each layer in the TOC. This map opened fine earlier in this exercise, so what happened?
Remember that ArcMap does not store data, but instead pulls the data from separate file sources. Since we removed the original features (shapefile and raster files), ArcMap can no longer find these files. It does not know that we moved the files to a geodatabase. Therefore, we must change the source paths for each layer (i.e. tell ArcMap that those layers now reside in a new geodatabase).
Right-click on Roads layer and select Properties.
In the Layer Properties window, select the Source tab.
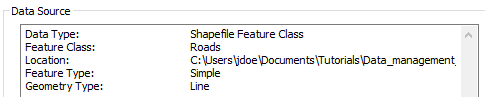
The Data source window confirms that ArcMap is looking for a shapefile called Roads located in the Data_managament_exercise folder (the shapefile you deleted in an earlier step). We will provide ArcMap with the new location.
Click on the Set Data Sources button ![]() .
.
Expand Acadia_data.gbd >> Vector_data and select the Roads feature.
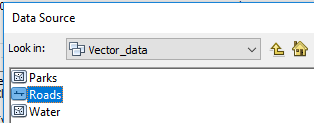
Click Add.
The Data Source window should now point to the correct the location.
Click OK to close the Layer Properties window.
We will repeat the same process to fix the source paths for Water, Parks and hillshade.
Next you will save the modified map document. But before you do, there is one more step that you will want to perform. ArcMap accepts full source path descriptions (e.g. D:\Users\jdoe\Documents\Tutorials\Data_management_exercise\) or source paths relative to the MXD map document location. In most cases, you will want ArcMap to save the source paths using the relative pathnames option.
In ArcMap, select File >> Map Document Properties.
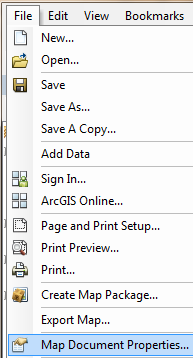
Make sure that Store relative pathnames to data sources is checked in the Map Document Properties window.
![]()
Click OK to close the Map Document Properties window.
Now Save your map document by clicking on File >> Save.
This completes this exercise.
![]() Manuel Gimond, last modified on 7/10/2018
Manuel Gimond, last modified on 7/10/2018