Projection
|
1. Create a folder called Projection somewhere under your personal directory (e.g. C:\Users\jdoe\Documents\Tutorials\Projection). 2. Download the data for this exercise then uncompress the Projection.zip file to your newly created Projection directory. |
In this short exercise, you will learn how to read coordinate system information from GIS data, define a coordinate system when one is not present, and re-project your GIS data to a new projection.
Step 2: Identify a layer’s coordinate system
Step 3: Identify the data frame’s coordinate system
Step 4: Projecting a layer to a new coordinate system
Step 5: Defining a coordinate system
Step 6: Re-project the conserved lands layer
Navigate to the Projection folder and open projection.mxd.
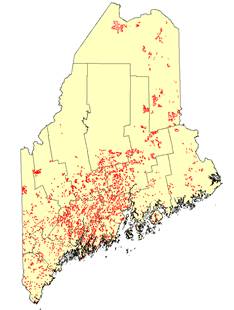
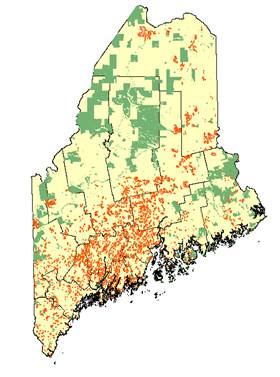
The map is composed of two layers: a Deer Wintering Areas layer and a Maine counties layer. Both layers seem to cover the same spatial extent inside of ArcMap yet, as you will shortly learn, they do not necessarily need to share the same projection.
Right click on Counties layer and select Properties.
In the Properties window, select the source
tab ![]() .
.
The information displayed under Data Source indicates that Counties’ coordinate system is based on a UTM projection (Zone 19 North to be precise) which is dependent on the North American Datum of 1983 (NAD83). Note that a cartesian (projected) coordinate system is based off of a defined geographic coordinate system (hence why you see both a projected coordinate system and a geographic coordinate system defined for this layer).
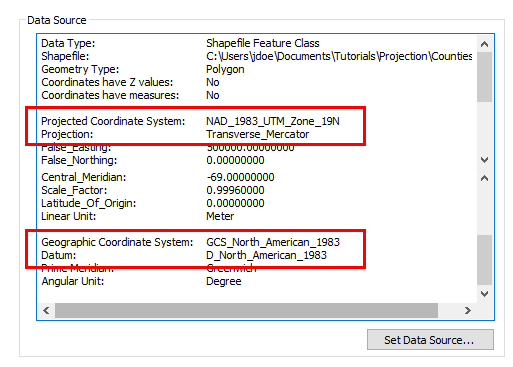
Layers do not need to share the same projection in a single map document. ArcGIS converts projections on the fly to a common map projection defined by the data frame.
Click OK to dismiss the Properties window.
Right click on Deer Wintering Areas layer and select Properties.
In the Properties window, select the source
tab ![]() .
.
The information displayed under Data Source indicates that the Deer Wintering Area’s coordinate system has no projected coordinate system (PCS), it is solely based on a Geographic Coordinate System (GCS) based off of the WGS 1984 datum.
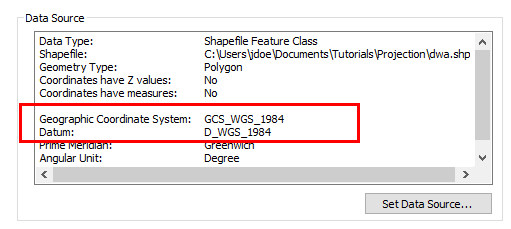
So we must assume that ArcGIS is converting one of the two layer’s coordinate system to a common data frame coordinate system… but which one?
Click OK to dismiss the properties window.
Right click on the data frame ![]() in the TOC and select Properties.
in the TOC and select Properties.
In the Properties window, select the
Coordinate System tab ![]() .
.
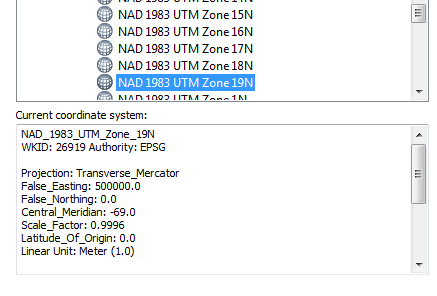
The information indicates that the data frame displays all layers in UTM Zone 19 North (NAD83)—the same projection as the one used by the Counties layer. Note that a data frame’s coordinate system does not need to match that of any one of the data layers. However, it is always good practice to ensure that all layers in a map project share the same coordinate system. In this exercise, we will make UTM zone 19 N (NAD83) this project’s default coordinate system.
Click OK to dismiss the Properties window.
In the next step, you will convert the Deer Wintering Area’s coordinate system to match that of the data frame’s.
In your ArcMap window, click on the Search tab (right-hand side of the ArcMap window).
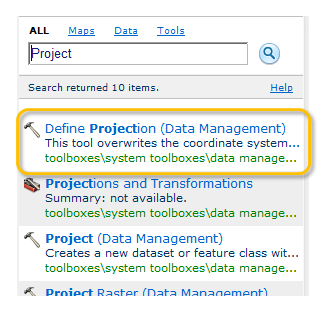
In the Search field type Project and click the
search icon ![]() .
.
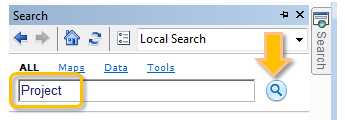
Using the Search option to find geoprocessing tools can be a fast alternative to navigating through the Toolbox toolsets.
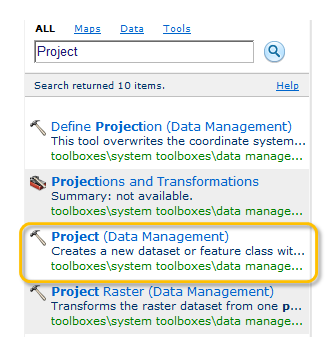
In the search result, click on the Project (Data Management) link.
Select Deer Wintering Areas as the input feature class and name the output dwa_UTM.shp.
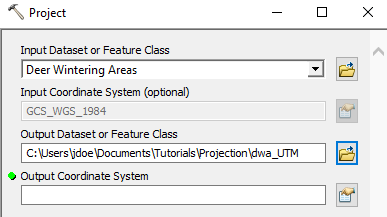
Click on the ![]() icon next to the Output Coordinate System
field.
icon next to the Output Coordinate System
field.
In the Spatial Reference Properties window select Projected Coordinate Systems >> UTM >> NAD 1983 >> NAD 1983 UTM Zone 19N.
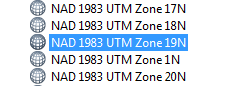
Click OK to close the Spatial Reference Properties window.
The projection will require a datum transformation (we are going from a WGS 1984 datum to a NAD 1983 datum).
In the Geographic Transformation field, select NAD_1983_To_WGS_1984_1.
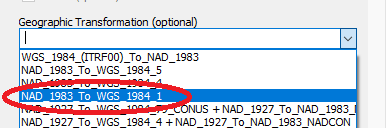
Note that this transformation works well for the state of Maine, but may not work well for other parts of the country.
It’s possible that ArcMap added a transformation by default. If so, you might see two transformations listed.
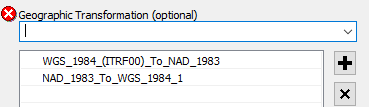
If you have WGS_1984_(ITRF00)_To_NAD_1983 listed,
select then remove it using the Remove icon ![]() .
.
Click OK to start the conversion process.
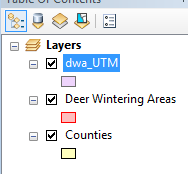
When done, you should see a new shapefile called dwa_UTM in the TOC. If it does not display in the TOC, add it manually from your project folder.
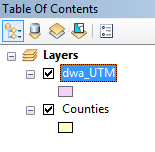
Remove the original Deer Wintering Areas layer (right-click then Remove).
Up to now all layers accompanying the map document had their coordinate system properly defined. However, there may be times when coordinate system information is missing.
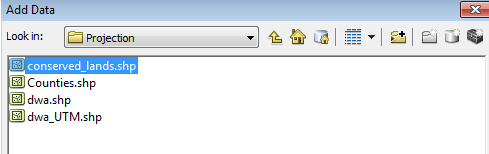
Add the layer conserved_lands.shp to the map (this layer resides in the Projection folder).
Note the display of a warning message indicating that the new layer lacks spatial reference information.

If this window pops up, click OK to dismiss the warning.
So where is the conserved_lands layer?
Click on the full extent icon![]() .
.

The new layer is clearly way off target. So what happened?
Spatial reference information tells ArcMap what projection and datum is used to define the coordinate system. If that information is missing, all ArcMap has to work with are the shapes’ (x,y) coordinate pair values. So the best ArcMap can do is assume that the new layer shares the data frame’s spatial reference system. This assumption clearly does not work in our case. So we need to define the new layer’s coordinate system.
It turns out that the layers coordinate system is an Albers equal area conic, NAD83.
Open the Search tab once more. The last search results should still be listed.
Click on Define Projection (Data Management).
Select conserved_lands as the input feature class.
Click on the ![]() icon next to the Output Coordinate
System field.
icon next to the Output Coordinate
System field.
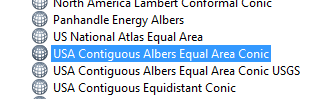
In the Spatial Reference Properties window select Projected Coordinate Systems >> Continental >> North America >> USA Contiguous Albers Equal Area Conic.prj. Be careful not to select the USGS projection version!
Click OK.
Click OK to close the Spatial Reference Properties window.
Click OK to launch the geoprocess.
When the process is complete, the conserved_lands layer should be properly positioned on top of the other existing layers.
We have two layers in the UTM coordinate system. We now want to re-project the Conserved_lands layer to the UTM coordinate system.
On your own, re-project conserved_lands to UTM NAD 83 Zone 19 N following the steps outlined in Step 4. Name the newly projected layer conserved_lands_UTM.shp and save it under the Projection workspace. Add it to the map when done.
Note that a datum transformation is not necessary here since both the Albers and UTM projections work off of the same NAD 1983 datum.
Finally, remove the original conserved_lands layer from the TOC. You should be left with three layers, all sharing the same PCS.
When finished, save and close the map document.
![]() Manuel Gimond, last modified on 7/11/2018
Manuel Gimond, last modified on 7/11/2018